
Mailchimp Countdown Timer — How to Add a Countdown in Mailchimp
Adding a Mailchimp countdown timer is an easy way to create urgency and boost clicks. With MailCountdowns, you generate a no‑watermark animated GIF timer and paste it into a Code block. Follow these steps to add a countdown in Mailchimp.
Prerequisites
Before you begin, make sure you have:
- A mailcountdowns.com account
- Access to your Mailchimp account
- An email campaign ready to be enhanced with a countdown timer
Step-by-Step Integration
1. Generate Your Countdown Timer with mailcountdowns.com
1. Log in to your MailCountdowns dashboard. You can click this link to open it in a new tab and keep this guide open at the same time!
2. Click "Create New Timer"
 3. Customize your countdown timer
 4. Save your countdown timer
 5. Copy the generated HTML code
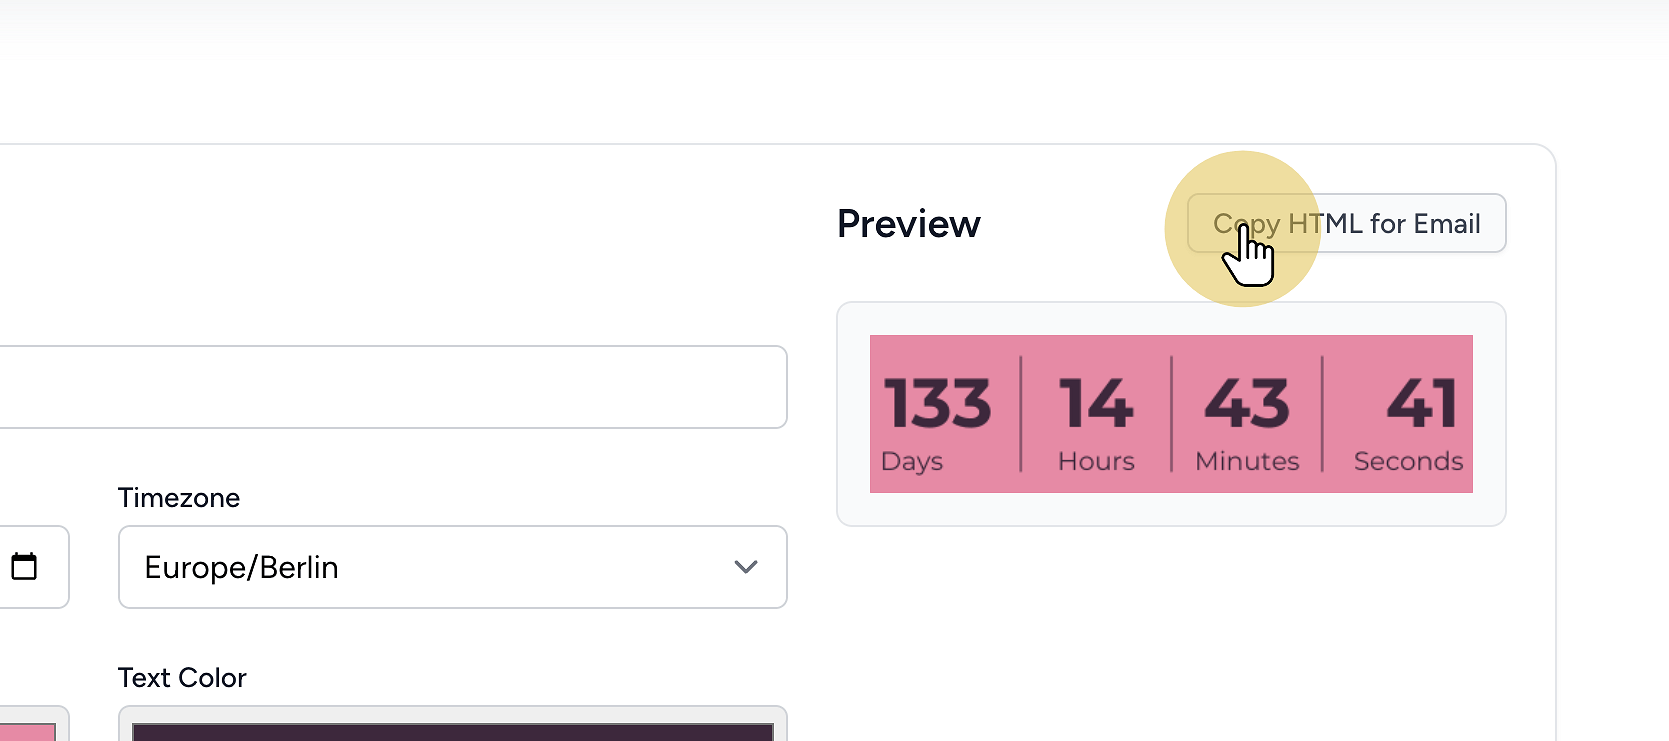
All set! You're ready to integrate your countdown timer. The HTML code is now saved in your clipboard and ready to be used.
2. Login to Mailchimp
-
Open your Mailchimp Account
Log in to your Mailchimp account and navigate to the campaign where you want to add the countdown timer. Open the campaign in the editor.

-
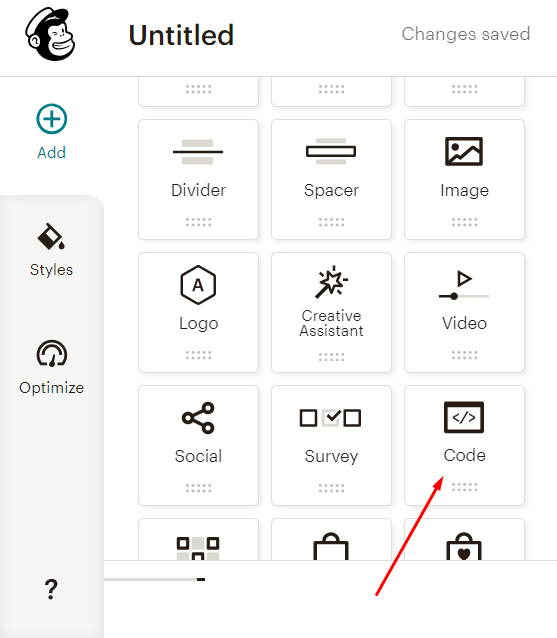
Select your Template and Add HTML
In the Mailchimp email editor, drag and drop a Code block into the desired section of your email template.
-
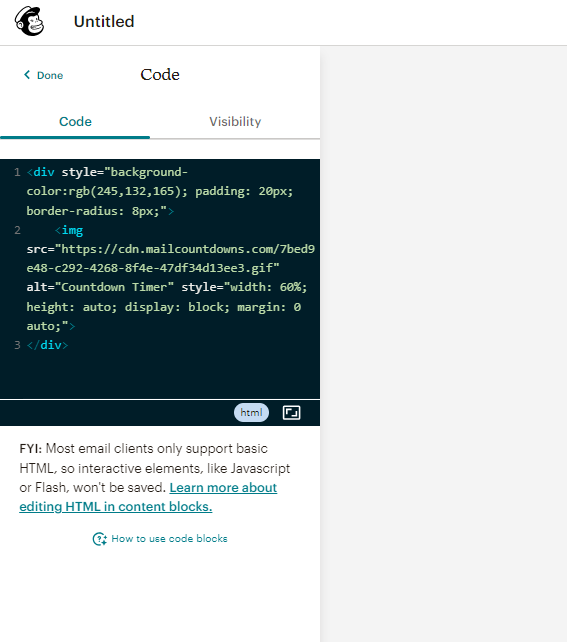
Add the Countdown Timer Code
Paste the HTML code for your countdown timer into the body section of the HTML editor. Ensure that the code is correctly placed where you want the countdown timer to appear in the email.
-
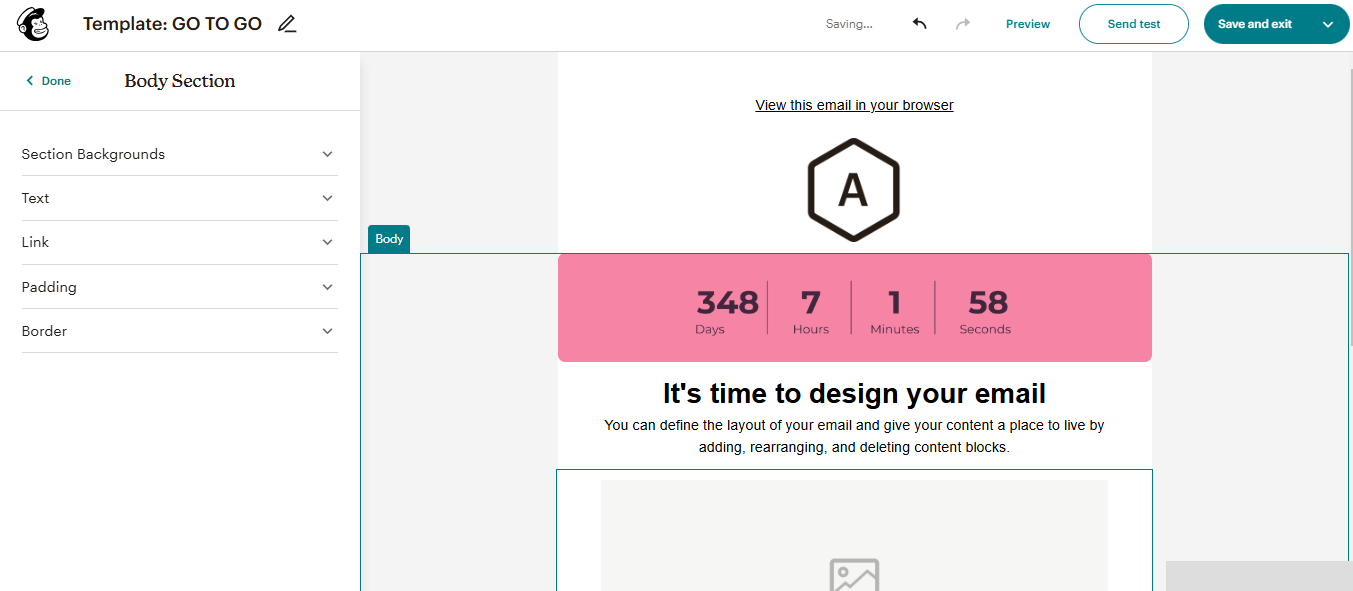
Preview and Test your Email
Use Mailchimp's email preview feature to ensure the countdown timer is displayed as intended. It's recommended to send a test email to yourself to verify that the timer updates in real-time. Check how it appears on both desktop and mobile devices.
3. Test Your Integration
Before sending your campaign:
- Send test emails to different email clients
- Verify the timer updates correctly (it should update at least every 2 minutes when reloading the email)
- Check mobile responsiveness
Best Practices
- Place your countdown timer prominently near your call-to-action
- Use contrasting colors that match your brand
- Keep the timer design clean and easy to read
- Test different positions to find the optimal placement
Advanced Tips
- Create segment-specific timers for personalized campaigns
- Use A/B testing to measure the impact of different timer styles
- Implement timezone-specific countdowns for global campaigns
Need Help?
If you need assistance with your integration, our support team is here to help. Contact us or visit our documentation for more detailed information.
Ready to get started? Create your first countdown timer today for free! Learn more about our features.Mailchimp Countdown Timer FAQ
Does Mailchimp support countdown timers? Yes—use a Code block and paste your timer HTML.
Will it animate for my subscribers? Yes, as an animated GIF in most clients. Outlook shows the first frame.
Is there a free, no‑watermark option? Yes. Create timers without watermarks on the free plan.
Related guides
- Klaviyo countdown timer: How to add a countdown in Klaviyo
- HubSpot countdown timer: How to add a countdown in HubSpot
- Omnisend countdown timer: How to add a countdown in Omnisend
- Free no‑watermark timer: Create a free email countdown timer
Ready to Add Countdown Timers to Your Emails?
Create urgency and boost engagement in your email campaigns with dynamic countdown timers.